So here is how I made these Quick, Easy Peasy Curtains.
I had two yards of Frozen material laying around, doesn't everyone with young kids, lol. They fit perfectly into her window. She doesn't need a lot of curtain, just enough to keep the sun out during the summer when she goes to bed or lightening when it storms.


Did I mention this material is very glittery too?


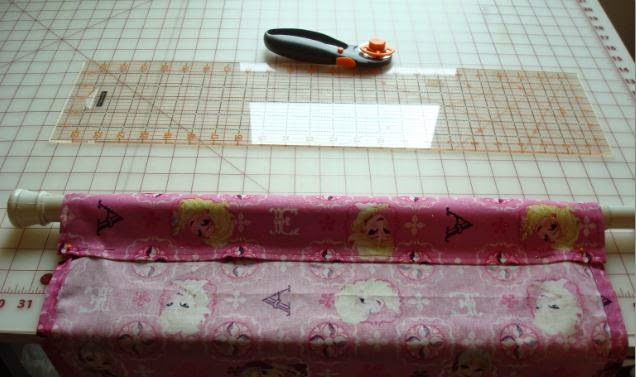
Next, I hemmed the long sides of each curtain with a half inch hem. This is how I hem, feel free to do the hem the way you are most comfortable with and at the size of hem you want. I took my long, 24 inch ruler and mark a 1 inch line with chalk all the way down each side I want to hem at the moment. I will talk about hemming the tops and bottoms in a minute.

Fold the fabric up to that line over at your ironing board. I start at one end and use my iron as a hold spot and continually move my free hand folding the fabric up to the marked hem line and then ironing what was just folded over with the iron. (I think that makes sense) Then, you can go back to the start on the same side or flip your fabric around to the other side and iron fabric up to the hem line. Once you have the first fold down, I then used the raw edge of the fabric to create another fold, this encases the raw edge into the hem. I just folded over at the raw edge line, ironing as I went, just like the first time folding the fabric over. From there, I went straight to my sewing machine, no pins since the fold should be nice and crisp from just been ironed and using my quarter inch foot, I sewed down the hem on both long sides of each set of curtains. You can sew closer to the far edge of the hem if you wanted to.
Now for the top and bottom. I just wanted to be quick about the project, so hemmed both the tops and bottoms at the same time. This time, I knew I was pushing the length of the curtains, so I wanted to keep as much as possible. I drew my line at 3/4 of an inch instead of the full inch. Quarter inch hemming is a pain, I think, 3/4 of an inch just gives you a little more fabric to grab a hold of. Again, I folded and ironed the fabric up to the hem line, then turned the fabric under again using the raw edge as my guide. Back over to the sewing machine and sewed another quarter inch seam.
Great! Now tops, bottoms and sides are all hemmed. Now to figure out how much you need to turn over on the top to create a loop for your curtain rod to go through. I "dry" fit mine, the only time I used pins on the entire project (I tend to use a lot of pins, when pinning).

Anyway, mine looked nice with three inches of the top folded over. I finger pressed the three inches of the top down and back over to the sewing machine. Sewing on the BACK, I used the hem seam as my guide to keep a straight seam across the top as I sewed the top fold into place. Voilà! Finished! I easily slipped the curtains onto the rod and hung them up. Now the room glows pepto pink when the sun hits them, but hey, she likes them, so I like them.
Before and after photos:


Thanks for reading,
Just a Mom who Sews

No comments:
Post a Comment
Thanks for your wonderful comment! I love hearing from everyone near and far! If you don't receive a reply, check to see if you are a no-reply blogger.